Setting up a VPN on a Raspberry Pi is one of the most practical and budget-friendly ways to secure your network, protect your data, and unlock internet freedom. Thanks to the affordability and adaptability of Raspberry Pi, users from tech enthusiasts to privacy advocates can now build their own VPN server at home or on the go. With a DIY VPN setup, you have complete control over your data flow, which means no third-party VPN services and complete customization over your privacy settings.
In this guide, I’ll walk you through setting up a Raspberry Pi VPN server while covering essential tips to maximize performance, security, and usability. Whether you’re using it to safeguard personal data, access home files from anywhere, or bypass geo-restrictions, a Raspberry Pi VPN server is a powerful tool to know about.
Why Use a Raspberry Pi
A Raspberry Pi VPN server isn’t just a DIY project; it’s a powerful solution for privacy-conscious users looking to take control of their data. Here are a few reasons why you might want to consider this approach:
- Affordability: At just a fraction of the cost of dedicated VPN hardware or a commercial VPN service, the Raspberry Pi makes building a personal VPN server affordable.
- Customization: You can choose every detail of the VPN setup, from protocols to encryption standards.
- Portability: Small, lightweight, and power-efficient, the Raspberry Pi can function as a VPN server at home or on the go.
- Privacy Control: Using your own VPN server means you’re not relying on third-party services to handle your data, giving you ultimate privacy control.
Setting Up Raspberry Pi VPN Server
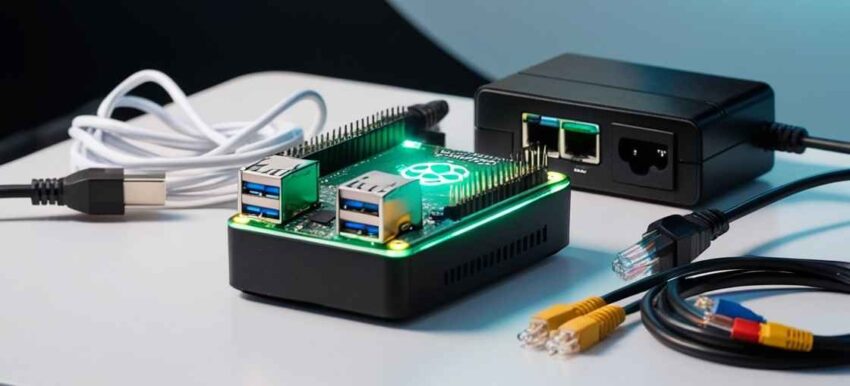
Gather Your Equipment and Prepare Your Raspberry Pi
- Requirements: A Raspberry Pi (ideally, a Raspberry Pi 3 or 4 for better performance), microSD card (16GB or more), a power supply, and a reliable internet connection.
- Setup the Pi: Download and install Raspberry Pi OS on the microSD card. Once installed, boot up the Raspberry Pi and open a terminal.
Install OpenVPN or WireGuard
Two popular VPN protocols for Raspberry Pi are OpenVPN and WireGuard:
- OpenVPN: Known for its compatibility and strong encryption standards, OpenVPN is widely supported and reliable.
- WireGuard: A newer protocol, WireGuard offers simpler configuration and higher performance with less resource usage.
For simplicity, I’ll focus on OpenVPN for this tutorial, though WireGuard is a great option if you’re seeking faster speeds.
Install and Configure OpenVPN
Step 1: Install openVPN
Before installing any new software, it’s crucial to ensure that your Raspberry Pi’s package list is up-to-date. Open a terminal window and enter the following command:
This command will first update the package list and then install OpenVPN in one go. The -y flag automatically confirms the installation, allowing it to proceed without requiring further input.
After the installation is complete, verify that OpenVPN was installed correctly by checking its version with the following command:
This should display the version information for OpenVPN, confirming that it’s ready for use.
Step 2: Configure OpenVPN
To streamline the installation and configuration process, we recommend using a script called PiVPN. This script simplifies the process of setting up your VPN server and handles many of the tedious configuration steps automatically.
- Download the PiVPN installation script. In your terminal, run:
This command downloads the script and runs it. The script will guide you through the installation process interactively.
- Follow the on-screen prompts: The PiVPN installer will ask you various questions regarding your setup, including:
- Choosing a VPN Protocol: You can select either OpenVPN or WireGuard. For this guide, select OpenVPN.
- Choosing a Local User: You will be asked to select a user account on the Raspberry Pi to manage the VPN.
- Setting Up a Static IP: It’s often recommended to set a static IP for your Raspberry Pi to ensure it remains accessible on your local network. The installer may guide you through this process.
Choose Encryption Settings
After you select the VPN protocol, you will be prompted to configure encryption settings. It’s important to select appropriate encryption levels:
- Encryption Level: PiVPN will suggest a default encryption level (usually AES-256). If you have concerns about performance, you may opt for a lower level (such as AES-128), but keep in mind that this could impact security.
- Other Settings: You can also specify additional settings such as client-to-client communication and DNS settings (you may choose public DNS servers like Google’s 8.8.8.8 or Cloudflare’s 1.1.1.1).
Create User Profiles
Once the initial configuration is complete, PiVPN will prompt you to create user profiles:
- Generate User Profiles: For each device that will connect to the VPN, you will need to create a user profile. This process involves generating unique client certificates and configuration files.
- Name the Client: Provide a name for the user profile (e.g., “MyLaptop” or “MyPhone”).
Once completed, PiVPN will save the configuration files for each client profile in a designated directory, typically located at /home/pi/ovpns/.
Step 3: Configure Firewall and Port Forwarding
To ensure secure access to your Raspberry Pi VPN server, you’ll need to enable port forwarding on your router and configure firewall rules.
Set Up Port Forwarding
- Access Your Router Settings: Open a web browser and enter your router’s IP address (commonly 192.168.1.1 or 192.168.0.1) to access the settings. You’ll need to log in using your router’s administrator credentials.
- Find the Port Forwarding Section: Look for a tab or section labeled “Port Forwarding,” “Virtual Server,” or something similar, depending on your router model.
- Add a New Port Forwarding Rule:
- Service Name: Give it a recognizable name (e.g., “OpenVPN”).
- Internal IP Address: Enter the static IP address of your Raspberry Pi (e.g., 192.168.1.100).
- Internal Port: This is typically 1194 for OpenVPN, but check your configuration in case you chose a different port.
- Protocol: Select UDP, as it is the recommended protocol for OpenVPN.
- Save Your Settings: Once you’ve entered this information, save the changes.
Configure Raspberry Pi Firewall
- Install UFW (Uncomplicated Firewall) if it’s not already installed:
- Allow OpenVPN Through the Firewall:
- Enable UFW:
- Verify UFW Status: Check that the firewall is active and the rules are correctly set:
Step 4: Create Client Profiles
Now that your OpenVPN server is installed and configured, you’ll need to create profiles for the devices that will connect to it.
- Create a Profile: Run the following command to generate a client profile:
Follow the prompts to name the profile and set a password if desired. This will create a
.ovpnfile for that client in the/home/pi/ovpns/directory. - Transfer the Profile: You will need to transfer the
.ovpnfile to the device that you want to connect to the VPN. You can use methods such as SCP (Secure Copy Protocol) or a USB drive:- Using SCP: From another computer, use the following command:
Replace
<Raspberry_Pi_IP>with your Pi’s IP address and<profile_name>with the name you gave the profile. - Import the Profile: On your client device (whether it’s a smartphone, tablet, or computer), install an OpenVPN client application. Import the
.ovpnfile to configure the connection.
Step 5: Test the VPN Connection
Once you have completed the setup, it’s essential to test the VPN connection to ensure everything is functioning as expected.
- Connect to the VPN: On your client device, open the OpenVPN client and select the profile you created. Click on “Connect” to establish the VPN connection.
- Verify the Connection: Once connected, you should see a confirmation message.
- Check Your IP Address: Open a web browser and visit a site like WhatIsMyIP.com. This will show you your current public IP address. If the VPN is working correctly, it should display the public IP address of your home network instead of your current location.
- Test Data Routing: To ensure that your data is being routed through the VPN, perform additional tests, such as accessing geo-restricted content or services. If you can access content that was previously restricted based on your location, it indicates that the VPN is functioning properly.
Optimizing Raspberry Pi VPN Server Performance
Raspberry Pi VPN server performance can vary significantly based on how it’s set up and the hardware in use. Here are some tips to get the best performance from your VPN:
- Choose the Right Raspberry Pi Model: Raspberry Pi 3 or 4 offers the best balance of speed and affordability for VPN performance.
- Use WireGuard for Faster Speeds: If high performance is a priority, consider using WireGuard instead of OpenVPN, as it’s optimized for speed.
- Limit Connected Devices: Since Raspberry Pi has limited processing power, try to limit the number of concurrent devices to reduce strain on the server.
- Optimize Encryption: Use a balanced encryption level—AES-128 offers decent security with less CPU load compared to AES-256.
- Use Ethernet over Wi-Fi: Ethernet connections are generally faster and more stable than Wi-Fi on Raspberry Pi, improving performance.
Security Raspberry Pi VPN Server
Security is paramount in any VPN setup, especially with Raspberry Pi. Here’s how to make your VPN server secure:
- Enable SSH Access Only When Needed: Limit SSH access to reduce attack vectors.
- Use Strong Passwords: Avoid default or simple passwords for Pi and VPN accounts.
- Update Regularly: Raspberry Pi and OpenVPN updates often include security patches, so keeping your system updated reduces vulnerabilities.
- Limit User Permissions: Only allow trusted devices and limit permissions for additional users.
Practical Applications
Setting up a VPN server on a Raspberry Pi opens up countless opportunities to secure and expand your digital life in creative and highly practical ways. Here are three of the most impactful ways a Raspberry Pi VPN server can make a difference in how you access, protect, and enjoy your online experiences.
Secure Public Wi-Fi Connections
Using public Wi-Fi is convenient, but it’s often unsecured, making it an easy target for hackers who may try to intercept data like your passwords, financial information, or even your browsing history. A Raspberry Pi VPN server provides a safe solution to this problem, allowing you to route all your internet traffic through your own VPN, even when you’re away from home. With your Raspberry Pi VPN, you create an encrypted tunnel between your device and your home network, essentially acting as if you’re surfing from the safety of your home connection.
When you’re connected to a public Wi-Fi network, all your online activity is encrypted, which means that anyone attempting to intercept your data would only see garbled information. This makes it much harder for malicious actors to spy on your personal or business communications, making it especially beneficial if you frequently work remotely, travel often, or simply want peace of mind while at a café, airport, or hotel. With a personal VPN connection running from your own server, you not only add a strong layer of security but also bypass the need to rely on paid or potentially shady third-party VPN providers.
Remote Access to Your Home Network
Another powerful feature of a Raspberry Pi VPN server is that it allows you to access your home network securely from anywhere in the world. Whether you need to access files stored on a home server, manage smart home devices, or even print documents remotely, a VPN connection enables you to do so with the same security as if you were physically at home. This means that with a secure internet connection, you can log in to your network as though you’re sitting right in your living room, regardless of where you actually are.
This is particularly useful if you have a home office setup or need regular access to files that are stored on a specific computer or NAS (Network Attached Storage) device. Using a VPN, you can access and even control devices on your home network, including smart thermostats, cameras, or lights, adding an extra layer of convenience. Moreover, with remote access enabled, small businesses or freelancers who work from home can use the Raspberry Pi VPN server to safely share documents or collaborate with team members without exposing sensitive data to the open internet. The setup also allows for seamless, secure communication, making it easier to work and stay productive, even when you’re far from home.
Bypass Geo-Restrictions and Access Localized Content
In a world where streaming services and websites often have geo-restrictions in place, a Raspberry Pi VPN server can be a game-changer for accessing location-specific content. Many streaming platforms, news sites, and even gaming services restrict or alter content depending on your geographic location. With your own VPN server, you can route your internet connection through your home IP address, which means you appear to be browsing from your home country, no matter where you actually are.
This is particularly useful for expats, frequent travelers, or students studying abroad who want to keep up with their favorite shows, sports broadcasts, or news from back home. It’s also a convenient way to access services that might otherwise be restricted when traveling internationally, such as accessing banking websites that are region-locked or using specific online subscriptions that only work in certain countries. Because the VPN routes your connection through your home network, you bypass these restrictions seamlessly, allowing you to use your favorite services as though you’re at home.
In addition, gaming enthusiasts often find this beneficial for accessing game servers in their home country, reducing latency and providing a more familiar gaming experience. And, if you’re working on projects where you need to access local content (such as a website with restricted access to certain regions), this VPN setup can allow you to view the web exactly as someone in your home country would, making it easier to manage tasks that require specific localization.
Troubleshooting
Setting up a VPN server on your Raspberry Pi can be a rewarding experience, but like any technology, it may come with its share of challenges. If you encounter issues with slow speeds, connection drops, or problems with your IP address not changing, don’t worry! Here are some helpful troubleshooting tips to guide you through these common pitfalls.
Slow Speeds
Experiencing slow speeds while connected to your Raspberry Pi VPN server can be frustrating, but there are several potential reasons for this issue, along with solutions to enhance your VPN performance:
- Switch to WireGuard: If you’re currently using OpenVPN and are experiencing slow speeds, consider switching to WireGuard. WireGuard is designed for better performance and efficiency, providing faster speeds and lower latency due to its streamlined code and modern cryptographic principles. It’s worth testing out, especially if you have a Raspberry Pi 4 or a newer model with more processing power.
- Check Your Internet Speed: Sometimes, the issue may not be with your VPN but rather with your internet connection. Use a speed testing tool (like Speedtest.net) to check your base internet speed without the VPN. If the speed is significantly lower than what your ISP advertises, the issue could be on your internet service provider’s end, and you may need to contact them for assistance.
- Limit Connected Devices: Raspberry Pi has limited processing power and memory, which means that the more devices connected to the VPN, the slower the performance might be. If you’re running the VPN server on a Raspberry Pi 3 or lower, consider limiting the number of simultaneous connections. Disconnect any devices that are not in use or consider upgrading to a Raspberry Pi 4 for better handling of multiple connections.
- Adjust MTU Settings: The Maximum Transmission Unit (MTU) defines the largest packet size that can be sent over the network. If the MTU is too high, packets may be fragmented, leading to slower speeds. You can try lowering the MTU setting in your VPN configuration files. A common value to test is 1400, but you may need to experiment with different values to find what works best for your network.
Connection Drops
Frequent disconnections from your Raspberry Pi VPN can disrupt your online experience. Here are steps you can take to troubleshoot and resolve connection drop issues:
- Check Firewall Settings: If you’re experiencing connection drops, one of the first places to check is your firewall settings. Ensure that the necessary ports for your VPN protocol (such as UDP port 1194 for OpenVPN) are open and that your firewall rules allow traffic to pass through without interruption. This might involve configuring settings on your router as well as on the Raspberry Pi itself.
- Ensure Ethernet Connection: For a more stable and reliable connection, it’s highly recommended to connect your Raspberry Pi to your router via Ethernet instead of relying on Wi-Fi. A wired connection reduces the chances of interference and signal dropouts, providing a more consistent performance, especially if multiple devices are connected to your home network.
- Confirm Port Forwarding: Port forwarding is essential for ensuring that incoming VPN traffic reaches your Raspberry Pi. Double-check your router’s port forwarding settings to make sure they are correctly configured. Ensure that the port used by your VPN server is forwarded to the correct local IP address of your Raspberry Pi. This will help maintain a stable connection.
- Check VPN Configuration Files: Sometimes, misconfigurations in your VPN settings can cause connection drops. Review your OpenVPN or WireGuard configuration files to ensure that they are set up correctly, especially the directives related to keep-alive settings. In OpenVPN, the
keepalivedirective can help maintain the connection by sending periodic signals to prevent the connection from timing out.
IP Address Isn’t Changing
If you’ve successfully connected to your VPN but notice that your IP address isn’t changing, it can undermine the purpose of having a VPN. Here are some steps to diagnose and resolve this issue:
- Verify VPN Settings: The first step is to check the VPN settings in your client application. Ensure that you are connected to the correct VPN server and that there are no configurations preventing IP address changes. Misconfigured client settings may cause local traffic to bypass the VPN tunnel, making it appear as though your IP address remains the same.
- Test Different Locations: If your VPN server has multiple configurations or locations, try connecting to a different server to see if your IP address changes. Sometimes, certain servers may not be functioning properly or may be incorrectly configured, preventing a proper connection.
- Flush DNS Cache: In some cases, your device may cache DNS settings that lead to confusion about your IP address. Flushing the DNS cache can help resolve this issue. For example, on Windows, you can do this by opening Command Prompt and typing
ipconfig /flushdns. On macOS, use the Terminal with the commandsudo killall -HUP mDNSResponder. - Check for DNS Leaks: If your IP address remains the same, you might be experiencing a DNS leak, which allows your internet service provider to see your original IP address. You can check for DNS leaks by using online tools like dnsleaktest.com. If a leak is detected, consider configuring your VPN to use secure DNS servers (like Google DNS or Cloudflare) or adjust the DNS settings in your VPN configuration files.
Conclusion
Setting up a VPN server on a Raspberry Pi is a rewarding project for those who value security and privacy. With a little patience and the right setup, you can create a powerful, customizable, and affordable VPN server that’s tailored to your specific needs. Whether you want secure access to your home network or a way to bypass geo-blocks, a Raspberry Pi VPN server offers a compelling solution.
